How to paint Infinity’s Starmada Action Pack with Contrast Paints
Contrast paints make painting faster and easier.
If you haven’t used them before, this is how they work: Contrast paints go on your models and, being thin paints, run into the cracks and crevices and details of your models. The end result is a base coat where much of your model is shaded (lowlights in the deep details and highlights on the higher surfaces) with a single coat.
Not too bad, huh?
That’s why Games Workshop’s Citadel Contrast Paints have gotten a lot of use in our painting table.
There are some tricks to getting them to work properly. For starters, you have to prime your models white. Without a light primer coat, they won’t look right. The paints are also something between a paint, a stain and a wash. They’re runny like a wash and flow into the details. They’re kind of like a stain because they seem to soak into the light primer, and extra coats only soak in again, making things darker.
But they work quite well, especially on detailed models.
Whereas with standard paints, you might prime, basecoat, wash, lowlight, highlight and then finish with details, often with contrast paints, you can prime, contrast basecoat and then detail. It saves some steps.
Around here, we dig contrast paints.
Look, I’m not going to lie to you. I’m not an expert painter. My output is decent. It is what I would call tabletop quality. It looks pretty good standing three feet away when you’re playing a game. But put it under a magnifying glass? There are flaws. It’s probably not going to win any awards.
But these paints make me faster and look pretty dang good without as much effort. Save time and make my minis pop? That’s a win-win for me.
Enter Infinity Models. They’re so detailed that they seem perfect for contrast paints. Contrast paints make any Infinity soldier — with all their belts and helmets and armor and guns and what-have-you — really pop.
So I tried them on models from Infinity’s new Starmada Action Pack.
The action pack, released along with Infinity’s new N4 rules, will let you field a full army. The Starmada in Infinity are inspired from Starmada, Majestic Twelve Games’ starship combat miniatures game.
(Honestly, if you wanted to take your Infinity games to the skies, Starmada seems like a good way to go. It’s billed as a “universal” system for starship combat, so it’d work as rules for any space-based RPG or miniatures game you’re playing including Infinity, Star Wars or Star Trek. Check it out.)
Starmada is Infinity’s newest faction, and it’s included in the Infinity N4 universe as something of a space police. The models are awesome and awesomely detailed.
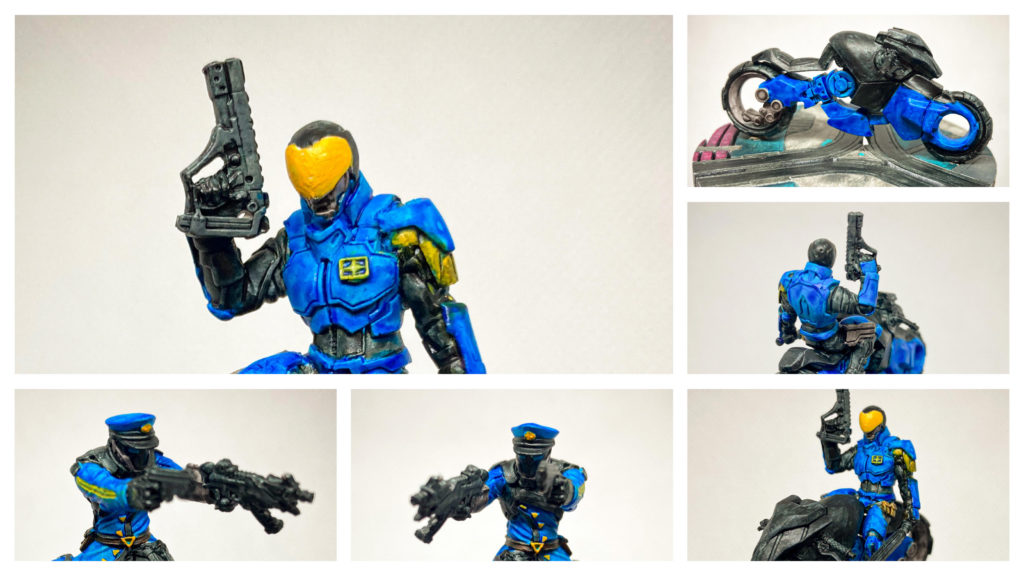
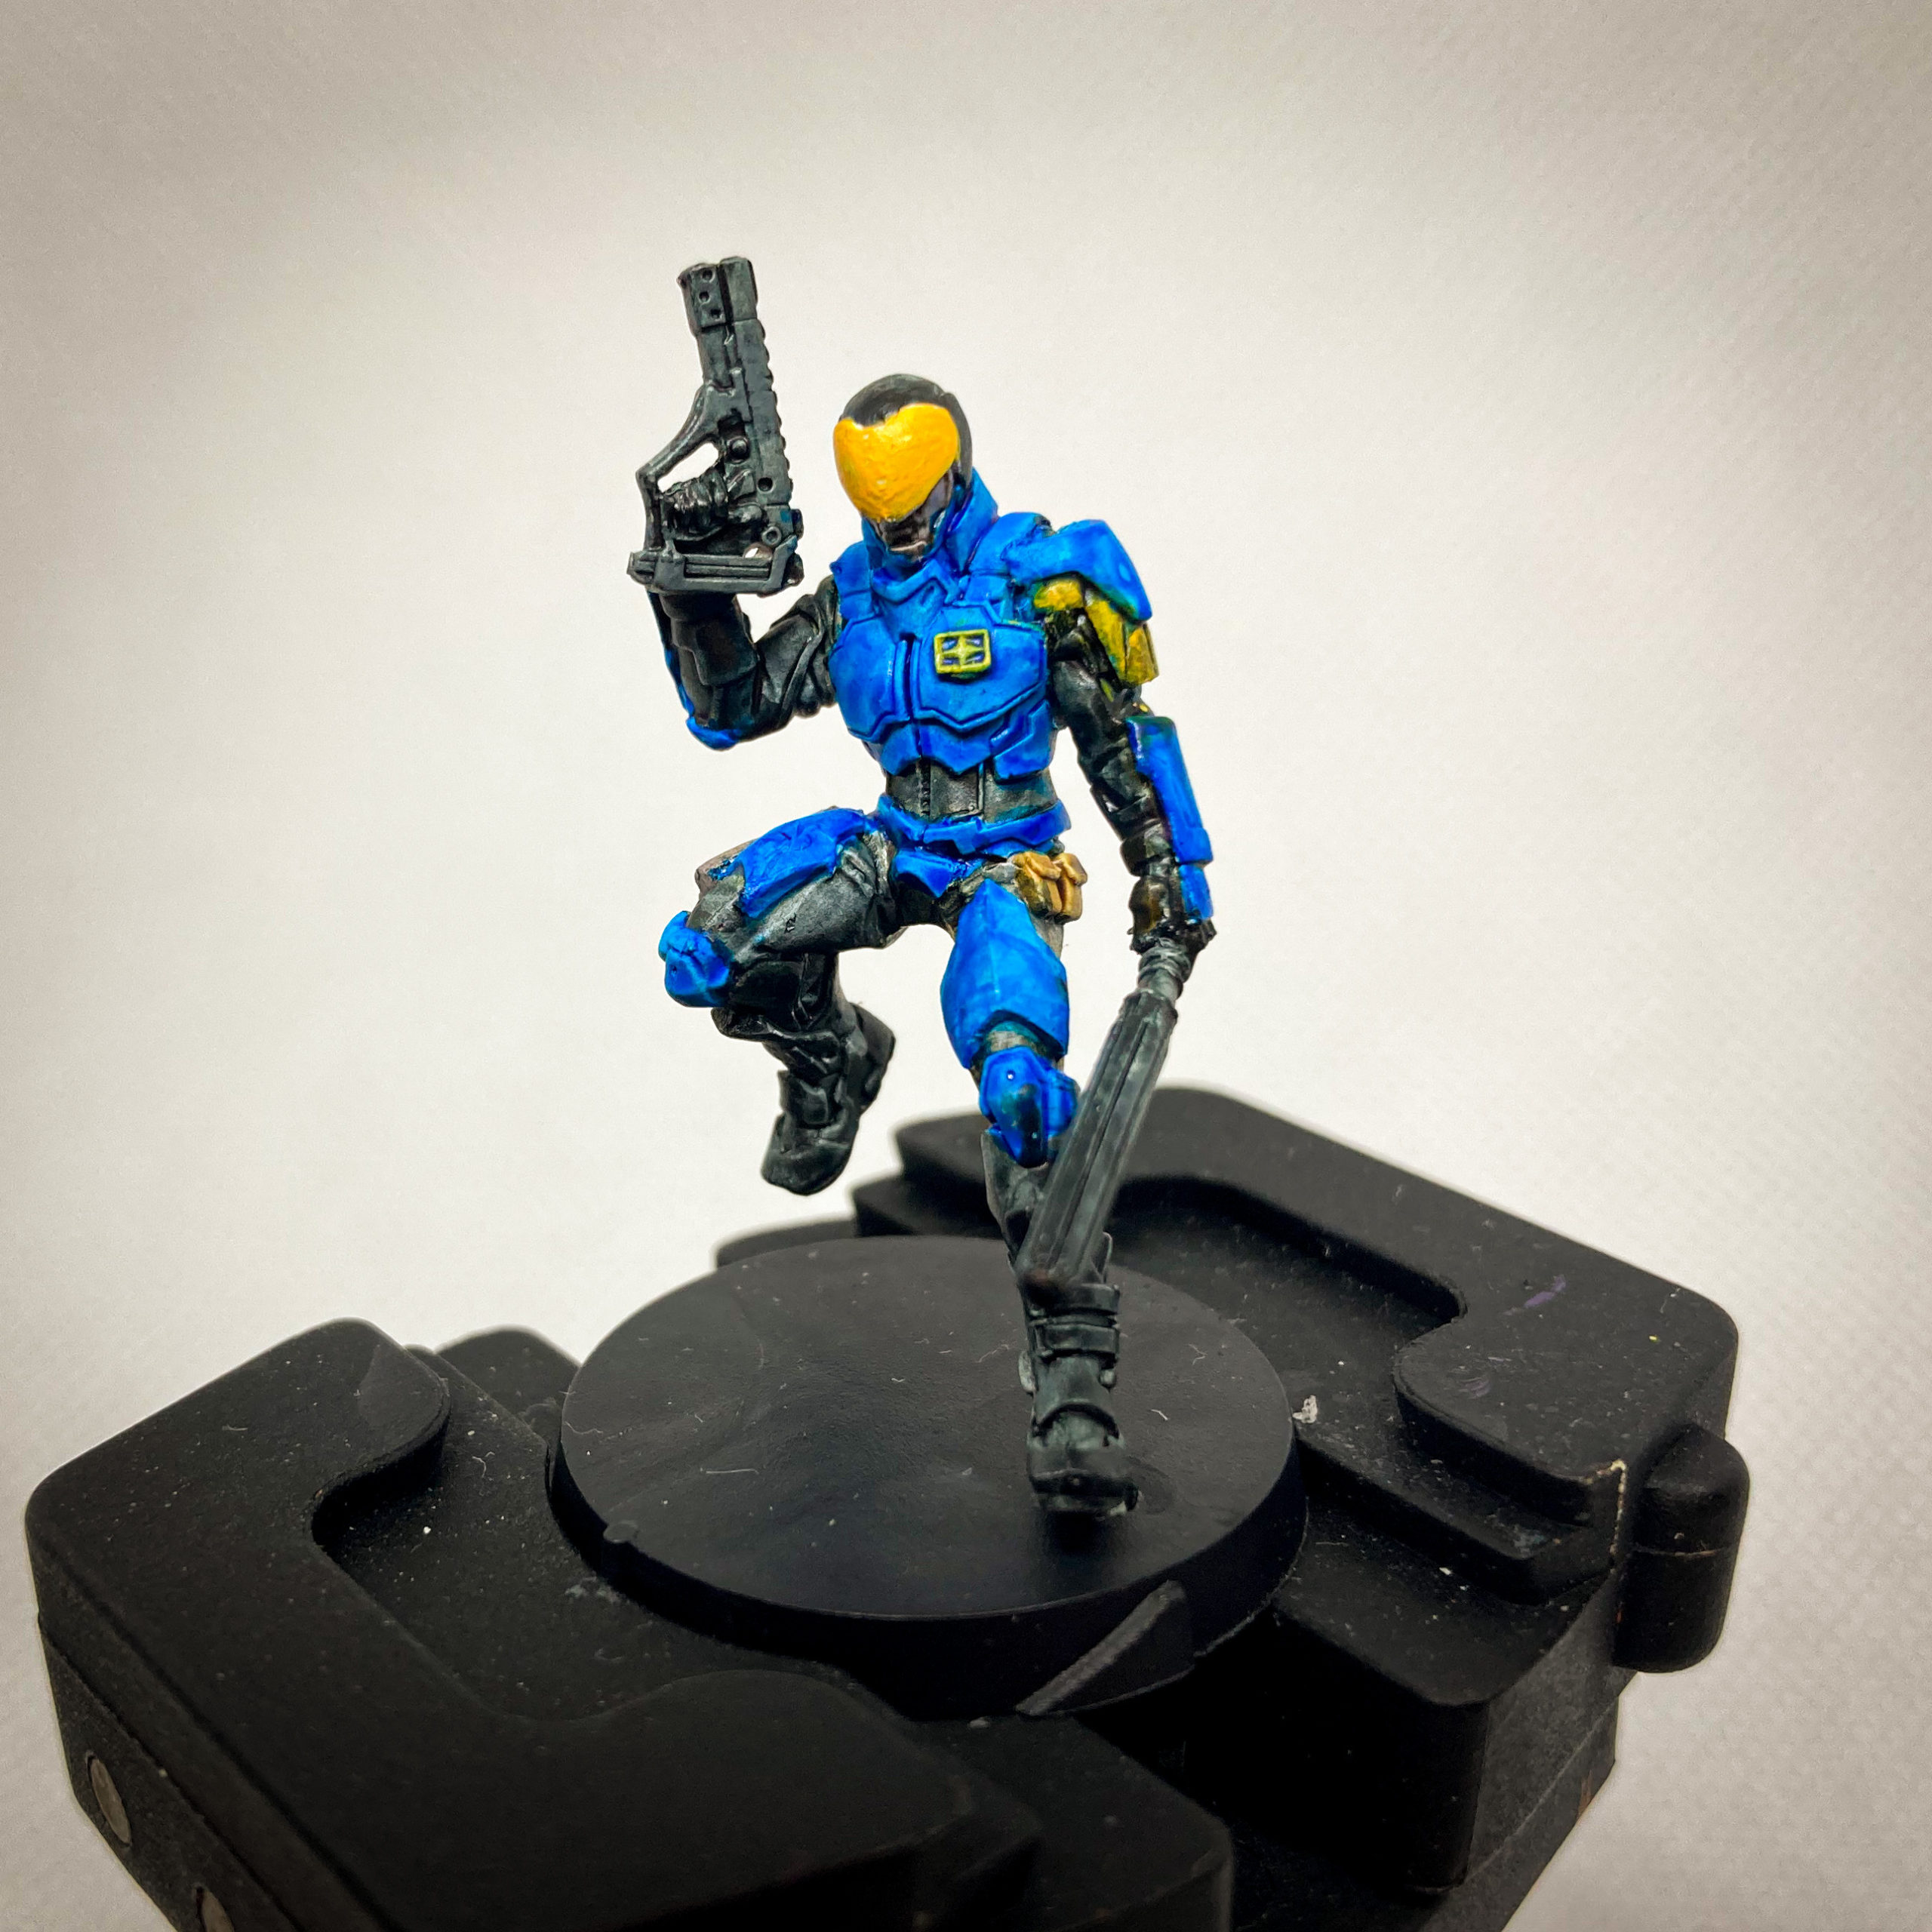
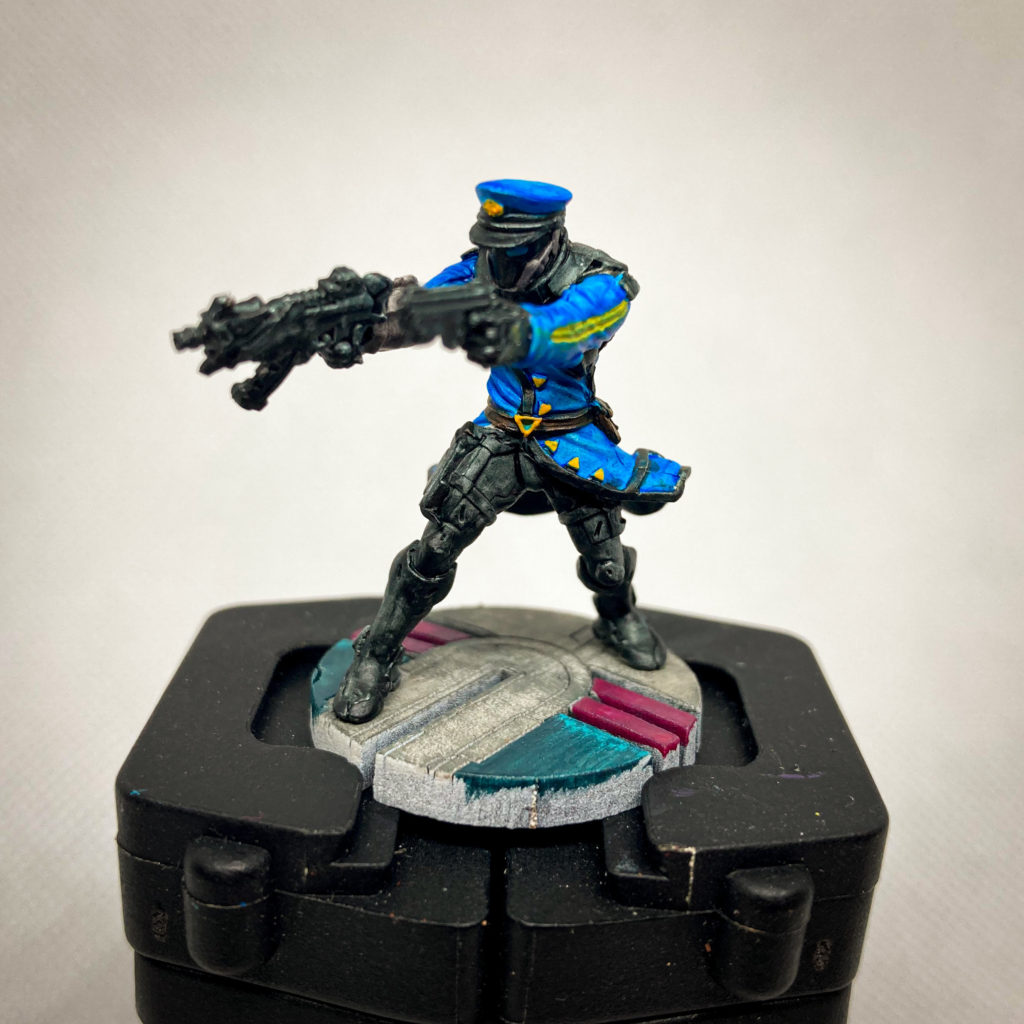
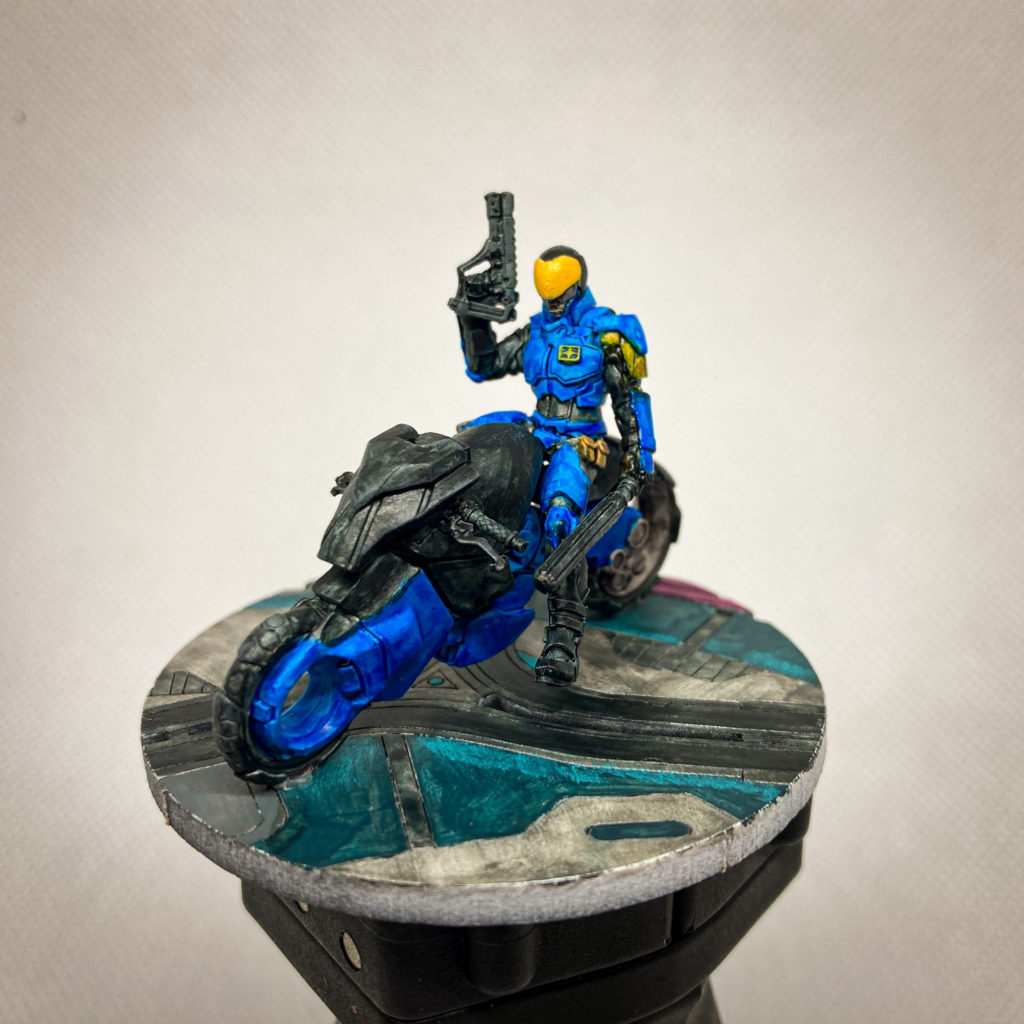
For this tutorial, I’ll show you how I painted two of the Starmada Action Pack’s models — Lawkeepers (an armored soldier on a motorcycle) and Bluecoats (a dual-pistol-wielding armored cop). And I’ll show you which contrast paints I used, where the paints worked well and also where they didn’t.
Assemble
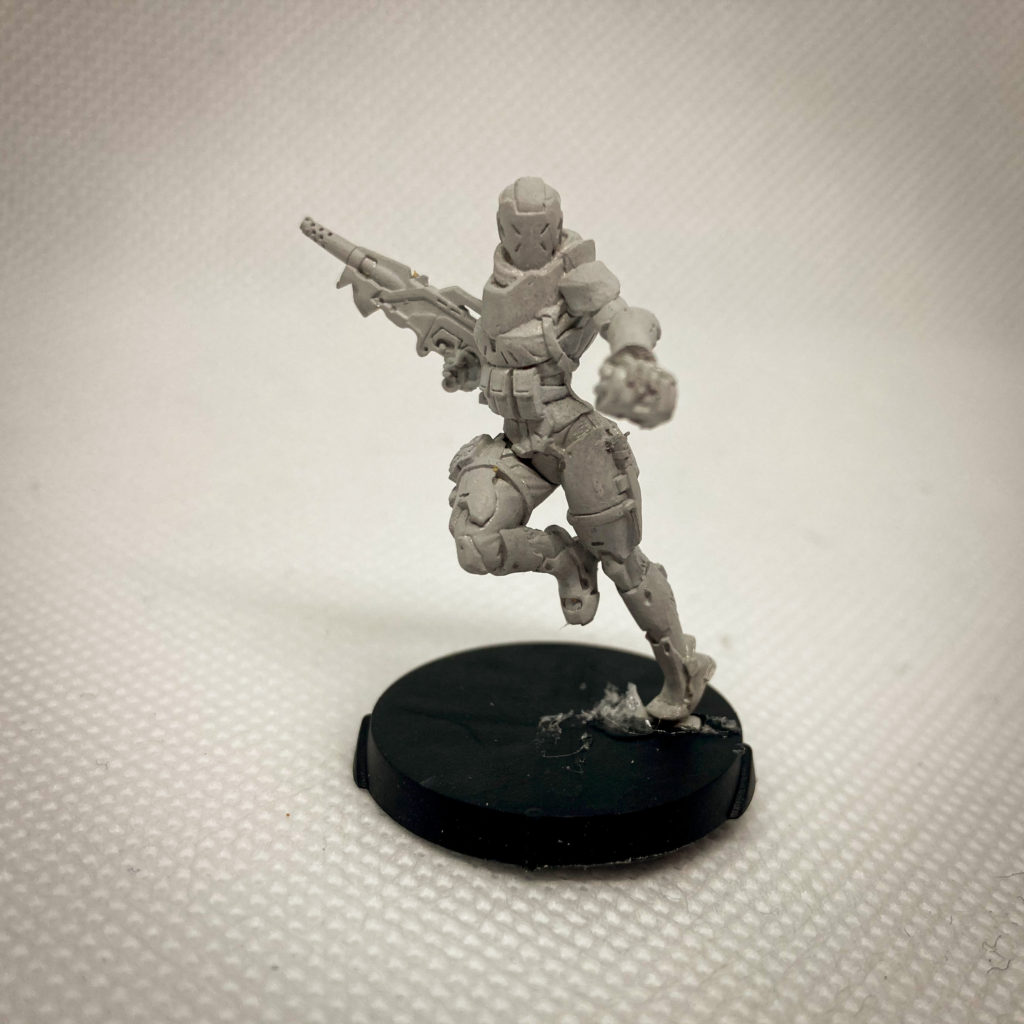
This is your standard model assembly: Clip, cut, file, glue.
Thankfully, Infinity models go together quite well. There are few mold lines and a normal amount of pieces to each model. This went pretty quickly. Even the Crusher model above, which had some thin pieces, was no trouble to assemble.
Prime
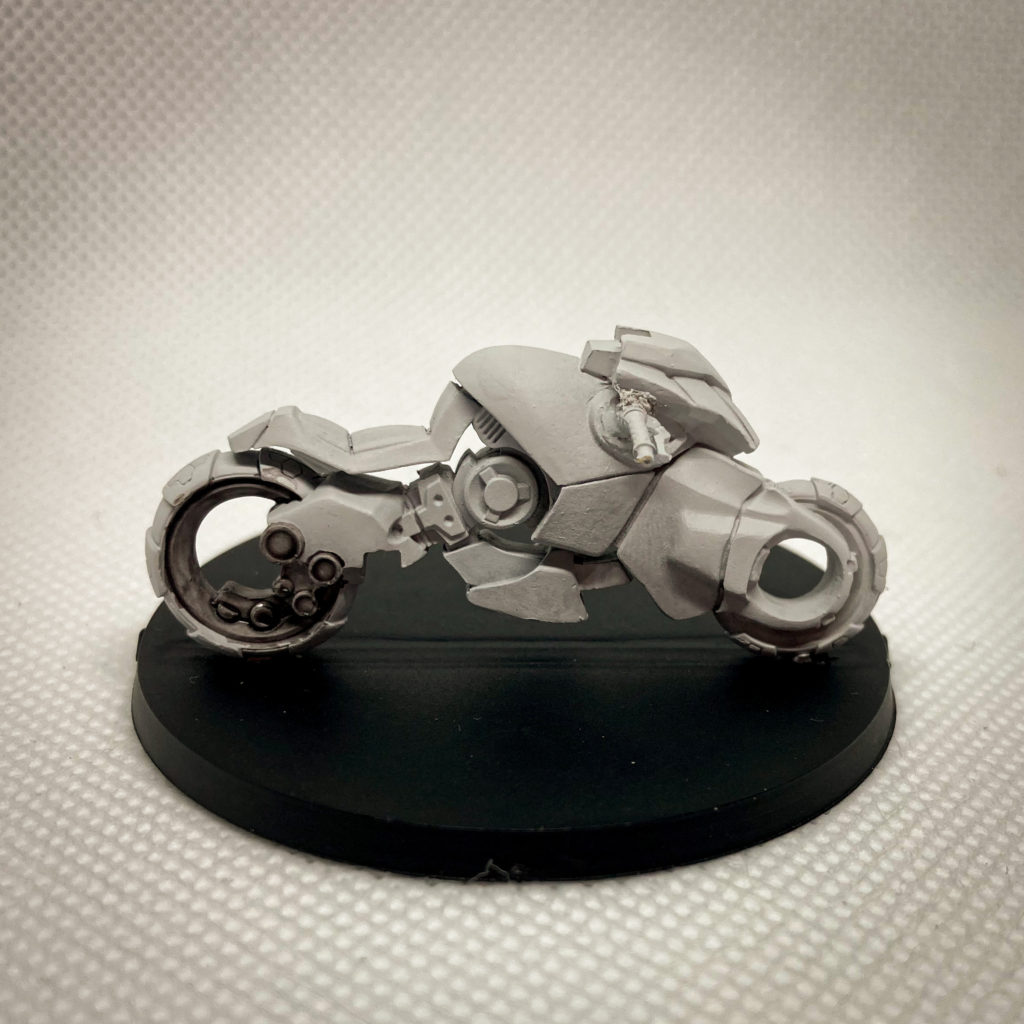
If you’re using contrast paints, you have to use a light primer. Citadel recommends a white primer, but my go-to primer is Vallejo’s grey surface primer. (I use an airbrush to give thin, even coats.) Using a grey or off-white primer will make your basecoat of citadel paints a bit darker than if you use white, but it’s not too much of a difference. (Check out some color comparison charts via Bell of Lost Souls.)
Basecoat
OK, here’s where we have some fun.
These are the space police, and looking at images of the professionally painted models, they’re depicted in blue, black, grey and some detail colors such as yellow, green, brown, light blue and flesh tones.
I mainly used three colors: Talassar Blue, which gives a nice, bright police blue; Black Templar for the darkest areas such as boots and the clothing under their armor; and Basilicanum Grey for other dark bits that didn’t need to be quite black.
As usual, I started with the clothes underneath and painted up each later of clothing. You’ll want to be careful here. If you stray out of the lines, so to speak, you’ll get black on the wrong portion of the model. And if you get black someplace, you won’t be able to paint over it with blue later. The black will stain, so you’ll have to fix any misses before moving on to the next color.
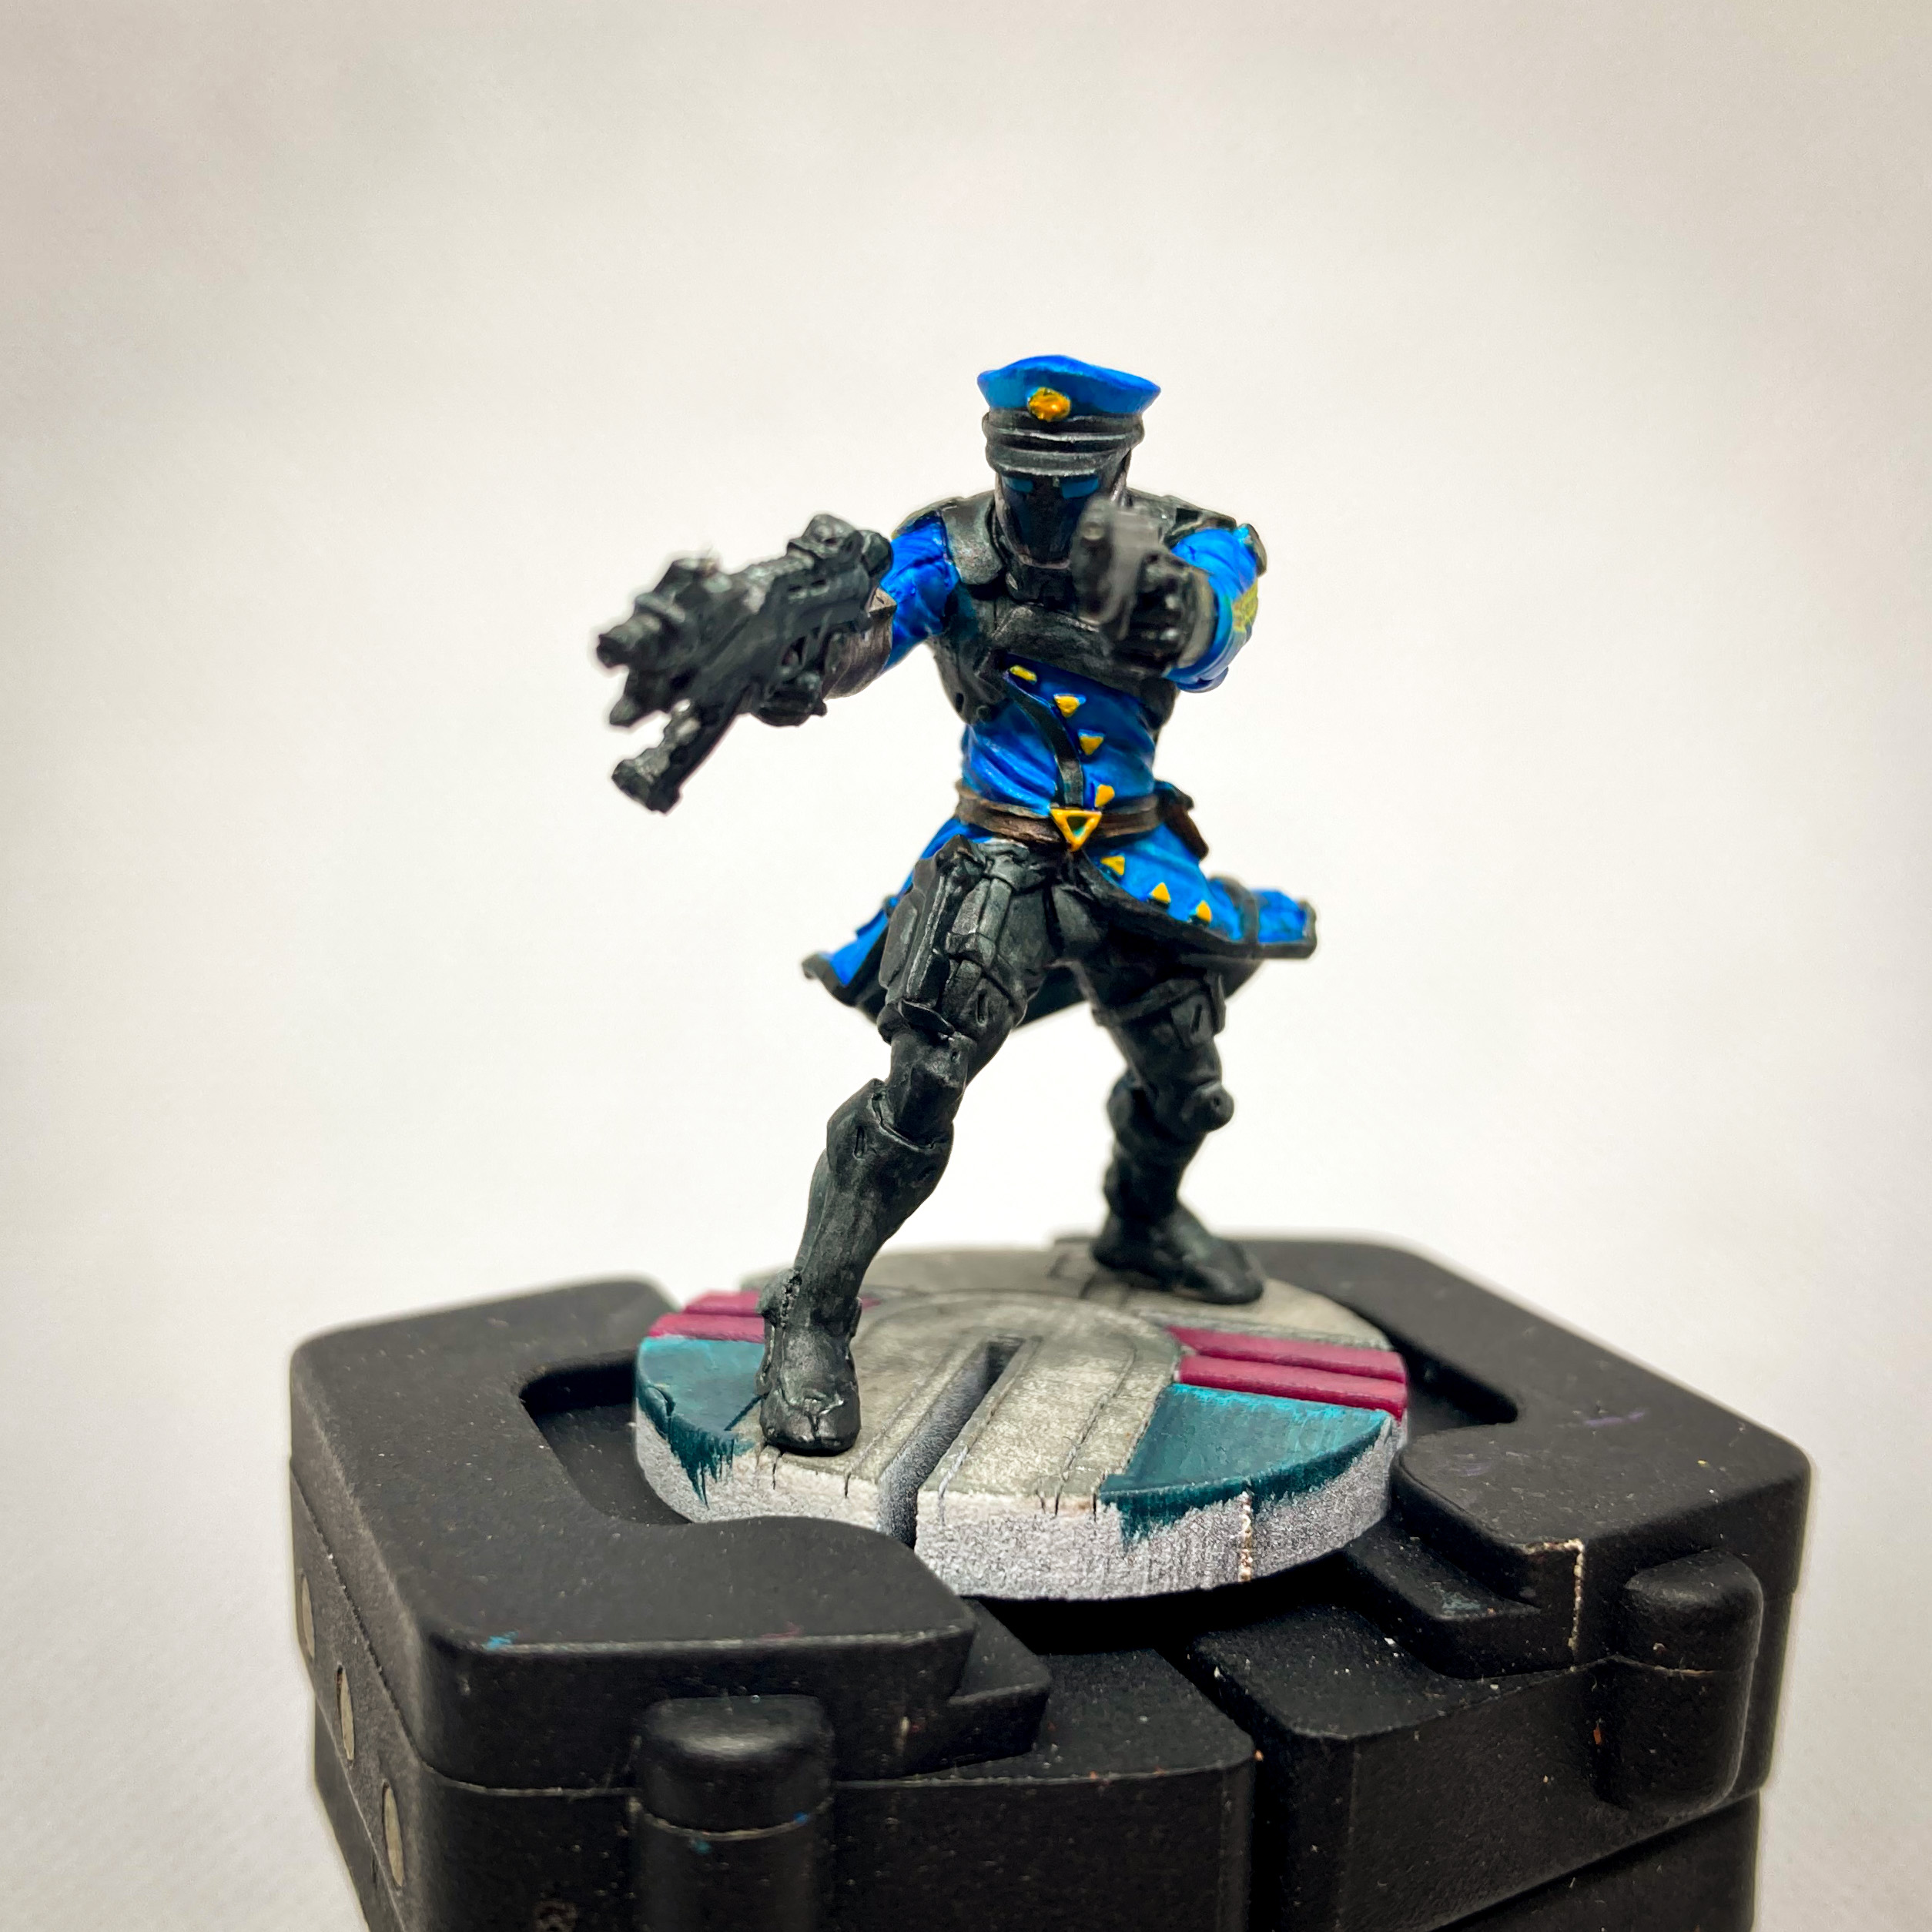
Downside
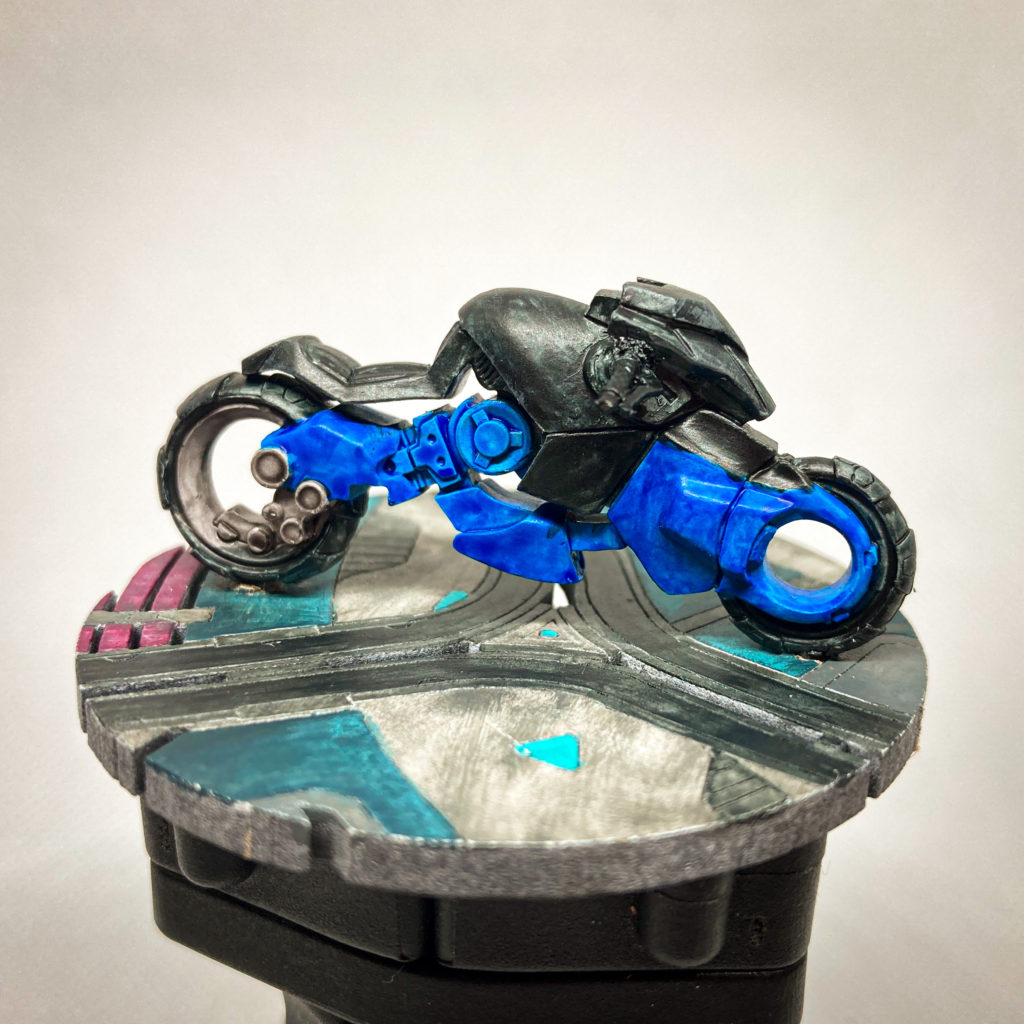
Contrast paints work quite well on detailed models, but just like washes, they don’t work well on large, flat surfaces. Take a look at the rider in the section above. His chest is just Talassar Blue. It looks pretty nice.
Then look at the motorcycle. I used the same paints, but those big, flat surfaces look kinda muddled. It’s … not great.
Thankfully, your eye should be drawn to the rider and the details on the underside of the motorcycle, so it’s not the worst. But if I were to do it again, I’d probably paint the motorcycle in a more traditional way.
Bases
You can use any bases you want. Starmada Action Pack came with Infinity’s Line of Fire Bases, but I wanted something more than the standard black.
I picked up Warsenal’s Daedelus Reactor 6 MDF bases and painted them like the floor of a well-worn spaceship.
Details
Next up is the detail work.
You can do as much or as little as you want to in this step. I used some Wyldwood contrast paint for some brown details (pouches, belts, etc.), Yriel Yellow for some of the yellow details (masks, badges, buttons, etc.), Arcane Blue for some glowing details (eyes, power sources, etc.) and a grey (honestly can’t remember which one) for a tiny bit of dry brushing.
Honestly, with the contrast paints already done, this step was just picking upa few details that needed to pop. The rider’s visor and his shoulder paid got a coat of straight yellow and a quick wash in Nuln Oil. His badge got drybrushed the same yellow. The cop got a little grey drybrush on his pistols. He got yellow on the pinstripes running down his arms and on the buttons on his coat.
They were small details, but they made the models pop.
And that’s it
Seriously. That’s all I did.
And they look pretty good. Or at least, as is my usual style, good enough to get on the tabletop.
I have to add that contrast paints reduced my usual paint time by about half. A lot of the time I spend painting involves getting the highlights and lowlights done after the basecoat is down, but those time-consuming steps are eliminated with contrast paints.
Contrast paints are not the answer to all of your prayers, but they are a useful tool, especially if you grab a couple colors you know you’ll use often.

Related Posts


About The Author
Kevin Coffey
Kevin is the editor-in-chief of Crit For Brains. He's also a husband and dad, full-time reporter and part-time Dungeon Master.